
WordPress is a great starting point to start building websites and is powering about 43.2% of all websites on the internet as of 2022. Using WordPress and page builders, you can build websites without the need to learn code and get a pretty good website. In this guide, we will show you how to install WordPress on a server with cPanel.
What is WordPress
Before we start the installation process, let us take a step back and first understand what is WordPress. WordPress is an open-source CMS (Content Management System). Open-source means that anyone can download, use and modify it for free. WordPress at its core is a basic blog out of the box. That means it has article pages (posts), normal pages, comments system, users system and more.
One of WordPress’ best features is the wide variety of plugins and themes, both free and paid. Simply put, plugins allow you to add functionality to your website by downloading (or buying) code someone else has written while downloading themes allow you to change the appearance of your website.
How to install WordPress
Now that we know what WordPress is, it is time to install it and start using it. This guide will be all about the installation part but we will soon upload more guides on how to use WordPress, WordPress programming, and building websites using free page builders such as Elementor.
In this guide, we will install WordPress on a remote server with and without cPanel’s installer but you can also install it on local servers. I will soon upload another guide on how to install WordPress using Xampp.
How to install WordPress using cPanel
Opening the installer
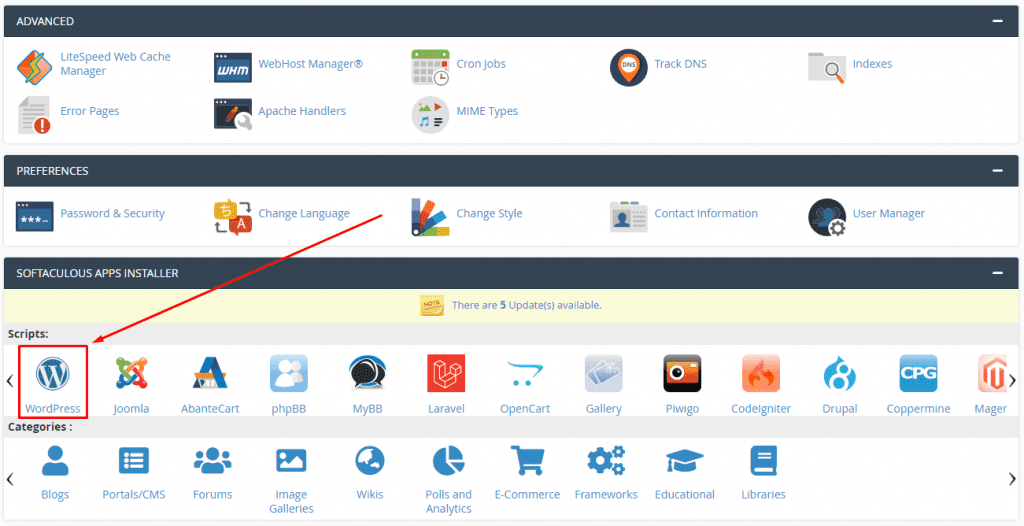
cPanel usually includes a WordPress installer. To access the installer, open your cPanel and find the WordPress icon in the “Softaculous Apps Installer” section and click on it.
This will open a page similar to this one:

Click on the Install tab and you will get a screen asking you for some information.
Breaking down the installer
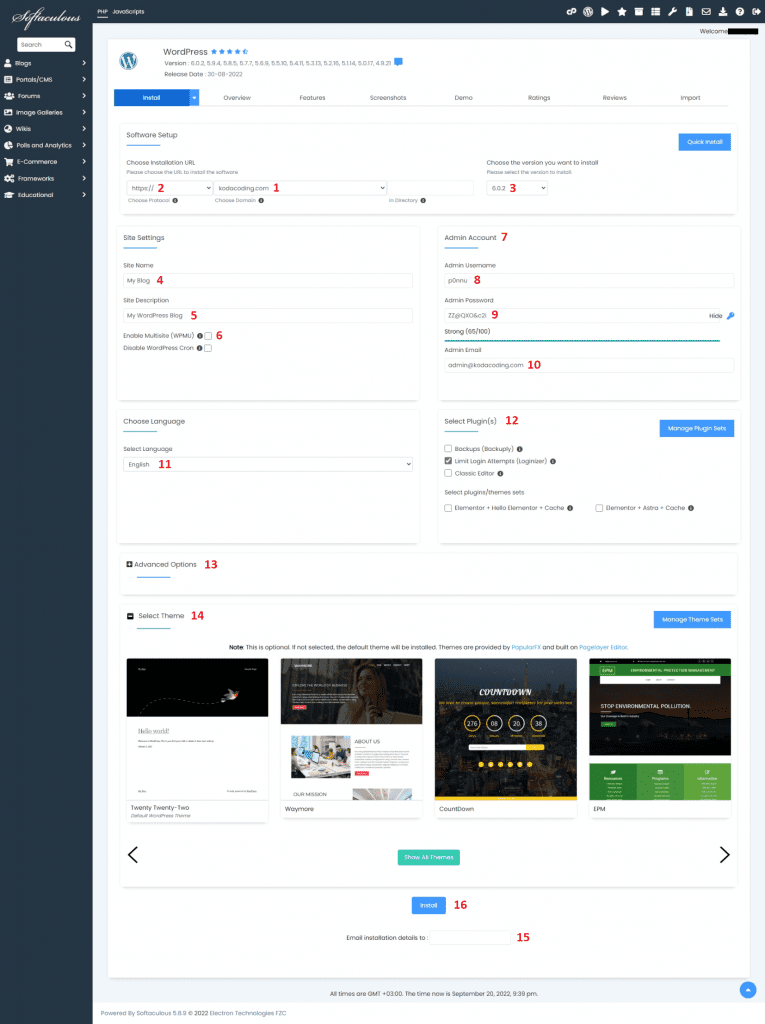
- The website (or domain) you want to install WordPress to.
- The protocol you want the new WordPress website to use. This should be set to “https://” or “https://www.”.
- If you set it to “https://”, your website address will be https://example.com.
- If you set it to “https://www.”, your website address will be https://www.example.com.
- WordPress installation version. The default is the latest version. Unless you have a good reason to, don’t change it as you would probably want the most updated version of WordPress.
- The website’s name. This can be changed later.
- The website’s description. This can be changed later.
- Enable multisite. Using multisite will allow you to manage multiple websites under one installation. We will soon upload a guide on the pros and cons of WordPress multisite and how and when to use it.
- In this section you can set the first admin account for your website. You can leave it with the default values or change it. Either way, you need to remember them to log in to your website later.
- The admin user’s username.
- The admin user’s password.
- The admin user’s email.
- Your website’s language. You can change it later. You can also make your WordPress website multilingual. We will upload a guide on that too soon.
- Plugins to pre-install. I usually like to deselect all so no plugins will be pre-installed.
- This section is used to change database-related settings. we will not cover it in this guide as the installer will create a new database and will connect our new website to it automatically.
- When installing WordPress, you can choose a theme to use for your website. The default theme is the one with the current year’s name. For example, at the time of writing this guide, the year is 2022 so the default theme will be called “Twenty Twenty-Two”. You can keep the default theme or change it to another one. You can also change it later.
- If you want the installer to send you all the installation details when it is done, enter the email address you would like it to send the details.
- Start installation button – pretty self-explanatory 🙂
Set everything as you like and install your new WordPress website.
After the installation is complete, you should see a screen similar to this one:
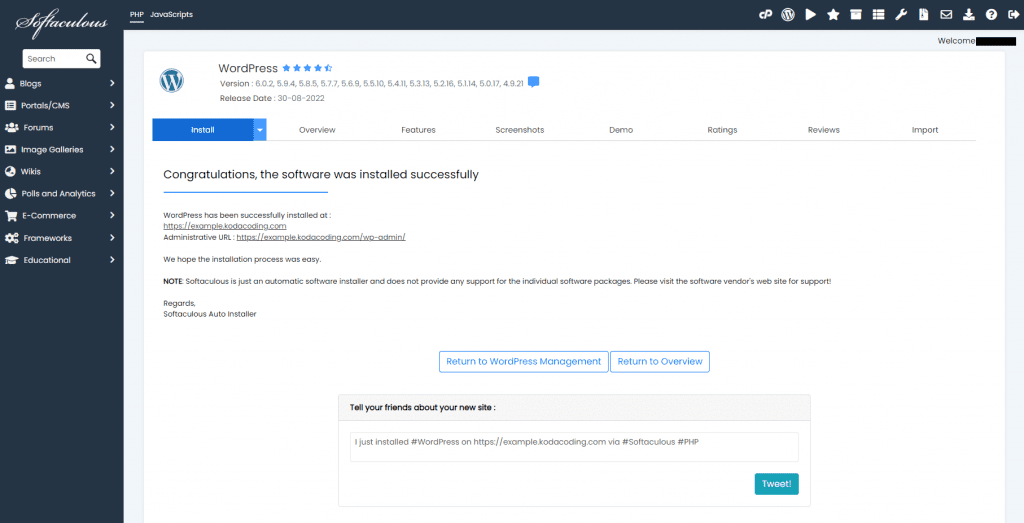
Your new WordPress website will now be via the links on that page. The first link will lead to your website and the second one to your website’s admin panel. Here I installed the website on a subdomain but you can install it on a subdomain or the main domain.
How to install WordPress via s/FTP
Some server using cPanel does not necessarily have the WordPress installer. But that does not mean you cannot install WordPress on them!
To install WordPress on a server without cPanel’s WordPress installer, we will need to set the database and the database user on our own, upload the WordPress installation files and you guessed it! install WordPress.
Uploading the WordPress installation files
First things first, let us download the latest WordPress installation zip file. You download it here.
Extract the zip file after you downloaded it, we will need it later.
Connect to your server using s/FTP and open your website’s folder. Usually, it will be in the “public_html” folder. Upload all the files inside the “wordpress” folder from the zip you extracted to the public_html folder on your server. Notice, the folder inside the wordpress folder should be in your public_html folder, not the wordpress folder itself.
Creating a database and a database user
If you will try to access your website now, it will open the WordPress installer but to install WordPress, we need a database to connect it to. Let us do that.
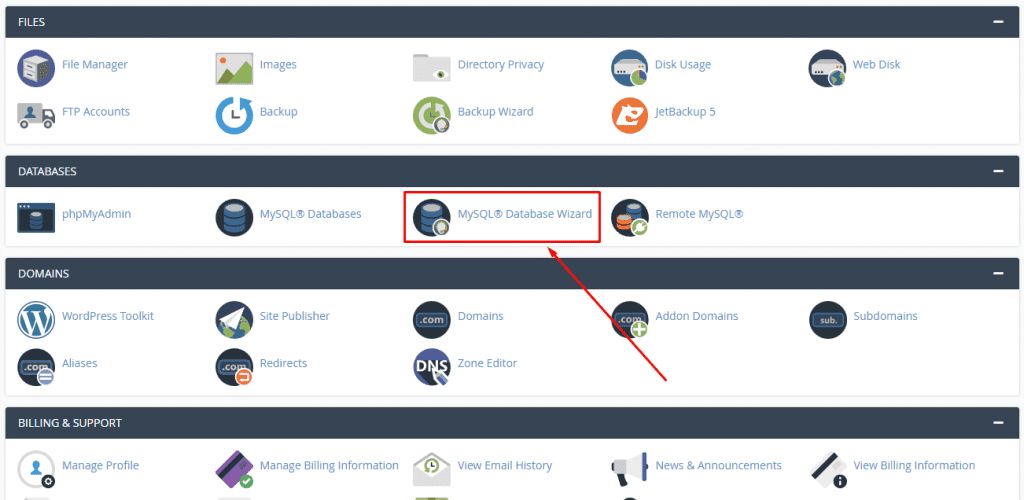
cPanel provides us with a simple wizard to add a database and a user with privileges to it. You can find it in the Databases section.
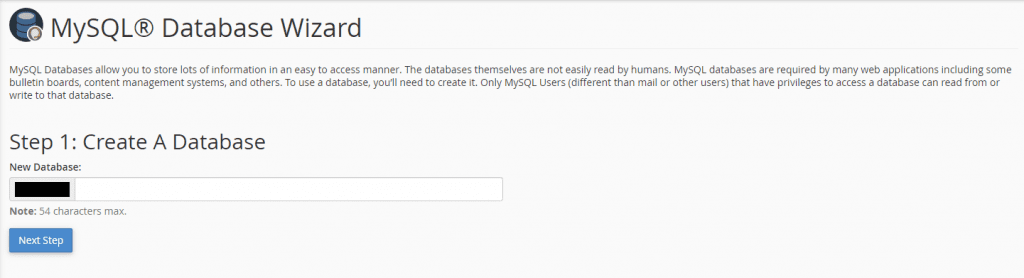
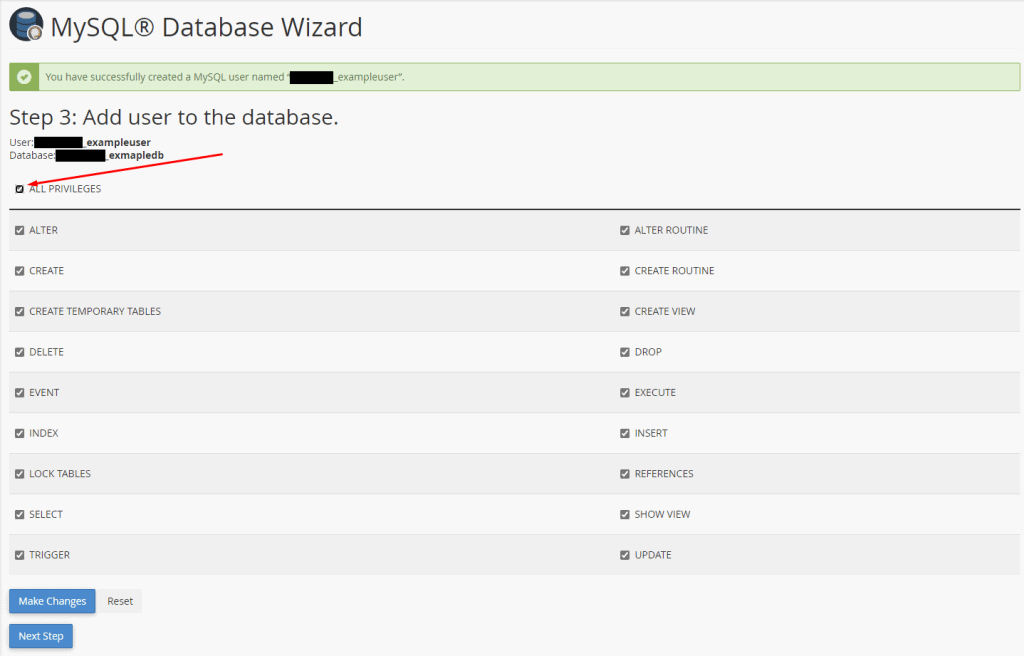
After opening the wizard, you will be asked to name the new database. Name it however you would like and click “Next Step”. I will name my database “exampledb”.
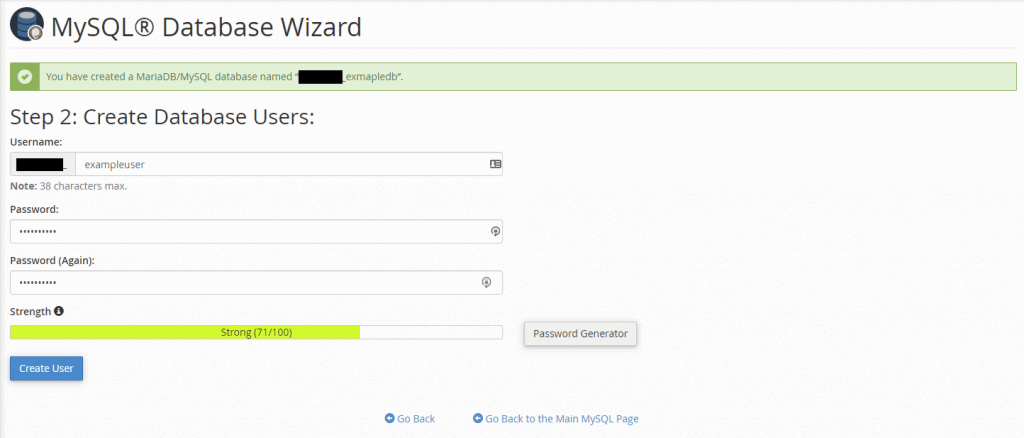
In the text screen, we will create the user for the database. Fill in the details as required and click “Next Step”. Make sure to save the credentials, you will need to provide them in the WordPress installer.
Now add the user’s privileges for the database you just created. Check the “ALL PRIVILEGES” checkbox and click “Next Step”.
That is it! You now have both the files on the server, the database and a user with privileges to that database. We can finally install WordPress!
Installing WordPress
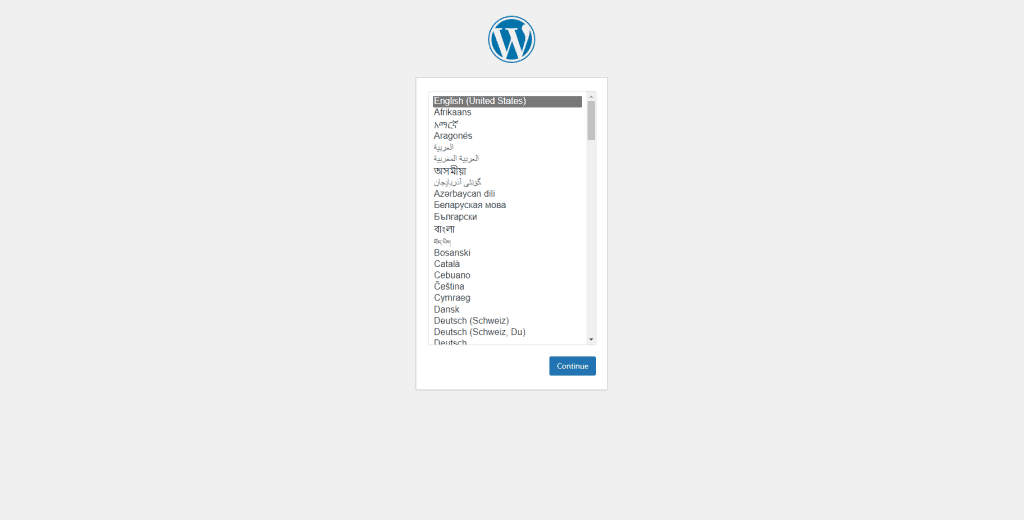
Open the WordPress installer by accessing your website and choose the language you would like WordPress to be installed with. I will go with English.
Now WordPress will welcome you and will tell you what details you need to install WordPress.
Click “Let’s go” to continue.
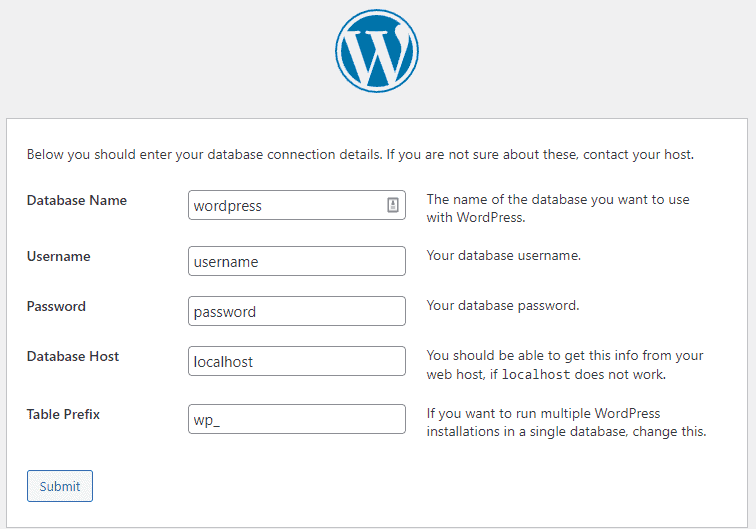
In the following screen, provide the detail and credentials you created earlier and click “Submit” when done.
The installer will now check if it can communicate with your database and if so you will see the following message.
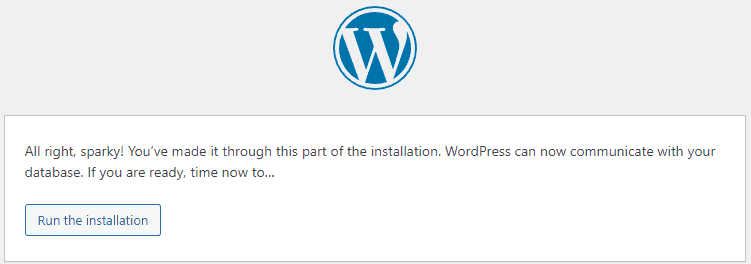
Click “Run the installation” to, well… run the installation.
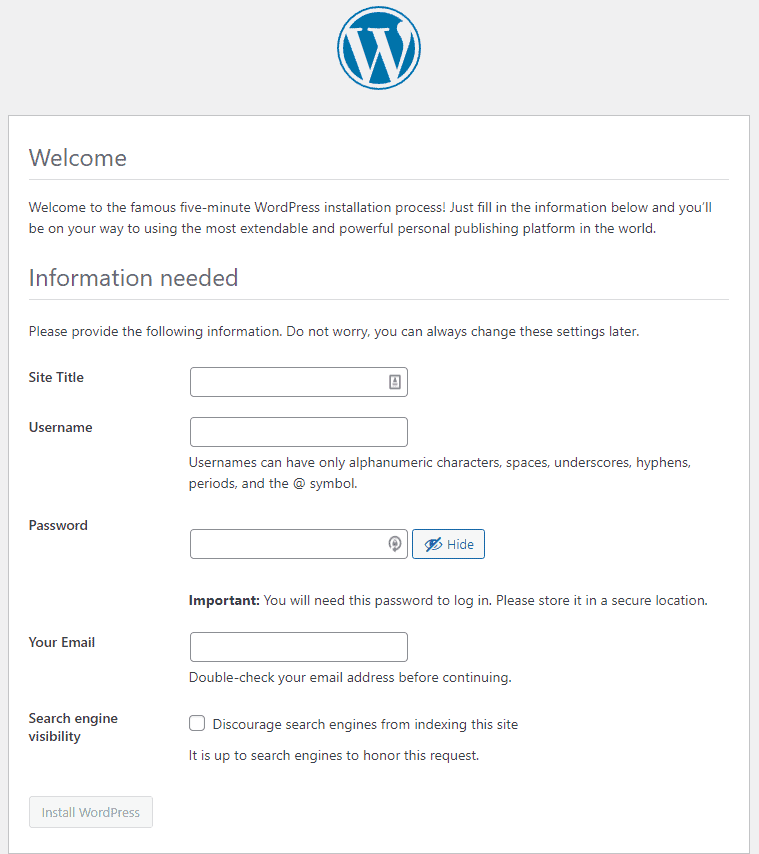
Now WordPress will ask you to provide some details about your website such as its title and a username and password for the admin user.
If you do not want search engines to index your new website, check the “Search engine visibility” checkbox.
After you are done providing the details, click “Install WordPress”.
If everything is good, you will see the following screen, saying the installation succeeded.
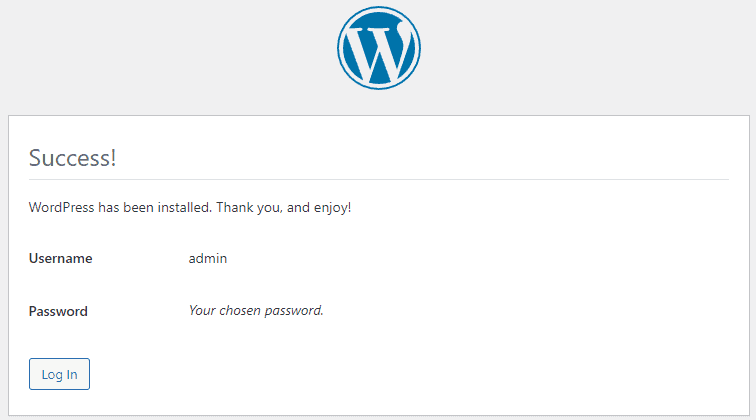
Click “Log In” and provide your admin user credentials.
Congratulations! You just installed WordPress!
Your website does not load?
Sometimes when installing a new website, we miss some important settings we have to do to let the world (and the internet) know how to access our website and what address people should use to access it.
If your website does not load, make sure you set all the DNS and Nameserver settings correctly.
If you got stuck at some point of this guide, please let us know in the comment below.
What’s next?
After you installed your WordPress website, it is time to start doing something with it. You have probably installed it either to build a website or to learn and experience WordPress. We have much more guide waiting to be uploaded so stay tuned for more.